In attempting to dual-boot between Windows 7 and Ubuntu 11.04, you will either install Windows anew, then install Ubuntu 11.04 alongside it, or install Ubuntu 11.04 alongside an existing installation of Windows. This tutorial uses as example, a case of installing Ubuntu 11.04 on an existing installation of Windows 7.
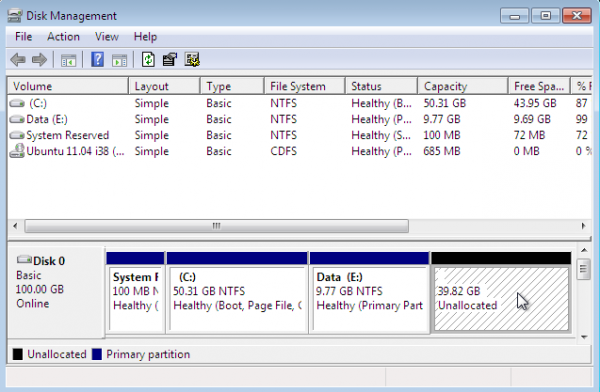
As shown in the image below, the existing installation of Windows 7 used for this tutorial has three primary partitions. And because of the limitations of the MBR partitioning scheme, only one primary partition is available for installing Ubuntu 11.04. By using an extended partition, we can configure as many partitions as we need for Ubuntu.
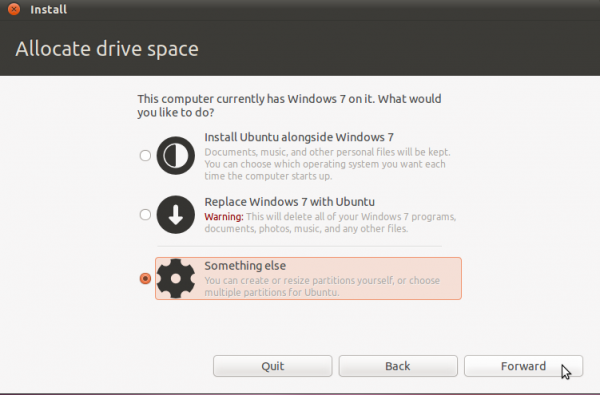
To begin, boot the computer using a Ubuntu 11.04 CD or DVD. At the disk partitioning step, the installer will present several options. Because the installer will not automatically partition and configure the free space, using the installer’s advanced partitioning tool is the only method of creating the necessary partitions. To launch the advanced tool, select the “Something else” option, the click Forward.
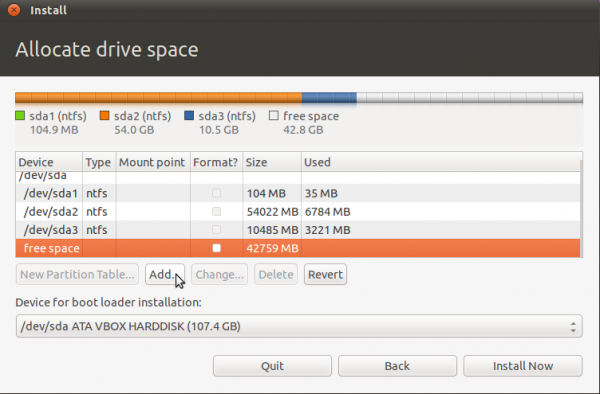
This is Ubuntu’s advanced partitioning tool and the detected partitions. The first three partitions are obviously the ntfs partitions that we saw in the first image. Because there are three existing primary partition, the last partition will have to be an extended partition, under which logical partitions for installation of Ubuntu will be configured.
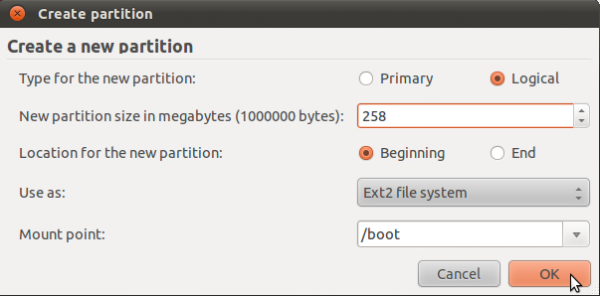
By default, Ubuntu’s installer configures two partitions – the first for /, the root directory, and the second for Swap. When creating partitions for installing any desktop Linux distribution, my recommendation is to create the following four partitions:
- /boot, the boot partition. This is where programs critical for booting the system will reside.
- /, the root directory. The bulk of the programs used for running the system will be installed here.
- Swap, unformatted disk space for use as virtual memory.
- /home, the partition where your home directory will be located. In the course of using the system, files and folders you create will reside in various folders here.
The second partition will be for Swap. It is possible to install Ubuntu without Swap. However, if you attempt to do that, the installer will try to discourage you with the following warning:
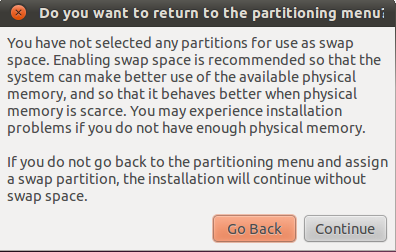
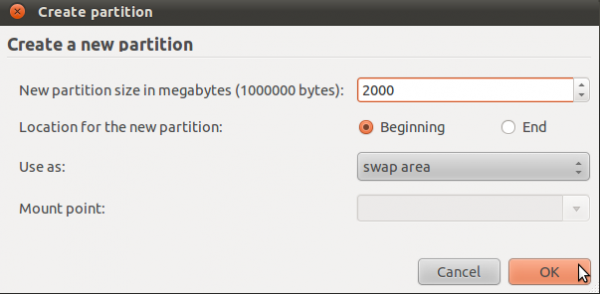
For the record, I have been able to install Ubuntu 11.04 successfully without Swap. The sky has not fallen yet, but I have not tried to put the system in Suspend or Hibernate mode. In any case, save yourself a load of trouble and configure Swap. The suggested size for Swap is 2000 MB. Select “swap area” from the “Use as” dropdown menu. OK.
The third partition will be for /, the root directory. The default journaling file system on Ubuntu 11.04 is ext4. You may stick with it or choose another journaling file system available. Btrfs is supported, but this partitioning scheme is not for btrfs. If you are interested, how to install Ubuntu 11.04 on a btrfs file system is a good place to start.
The installer recommends a minimum of 4.4 GB for Ubuntu 11.04, but on a new installation, less than 3 GB of disk space allocated to / is used. Note that as you install additional applications after installation, disk space used will grow, so be generous here. I think 10 GB should be more than enough. OK.

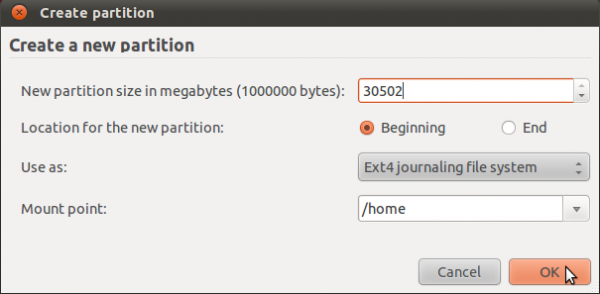
The last partition will be for /home. The file system is ext4, and you may allocate all available disk space to it. OK.
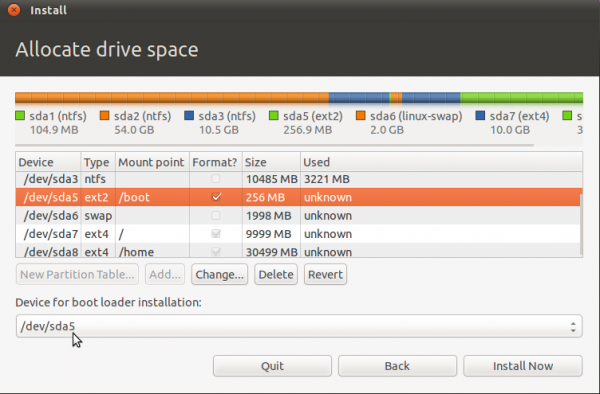
All the partitions have been configured. You may continue with the rest of the installation. But before you do, decide where you want to install GRUB, the boot loader. You may install it in the Master Boot Record (MBR), the default, or in the boot partition (/dev/sda5 in this example). A good case can be made for either choice.
If you install GRUB in the MBR, it will overwrite Windows’ boot programs. This is the most common and requires no other configuration on your part. However, upgrading or reinstalling Windows, or even installing a Service Pack can overwrite certain aspects of GRUB. Restoring GRUB is not a very difficult task, but you can save yourself the trouble by installing GRUB in the boot partition of Ubuntu. This is the recommended method because it completely separate the two operating systems, even as they co-exist on the same disk. It does requires additional configuration on your part. That, however, is nothing compared to the potential headache of the other option.
For this tutorial, I will follow my recommendation and install GRUB in /dev/sda5, the boot partition. Note that the version of GRUB used by Ubuntu 11.04 is GRUB 2.
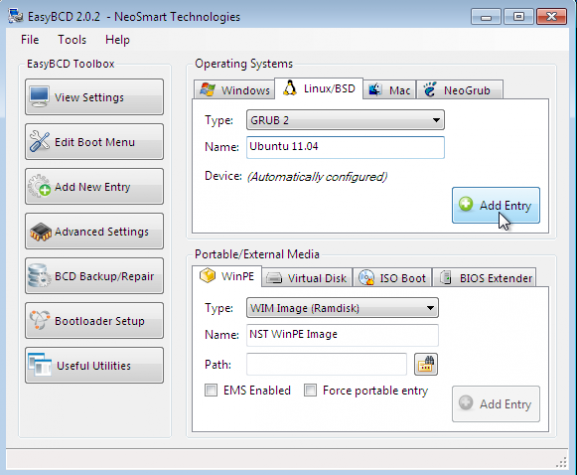
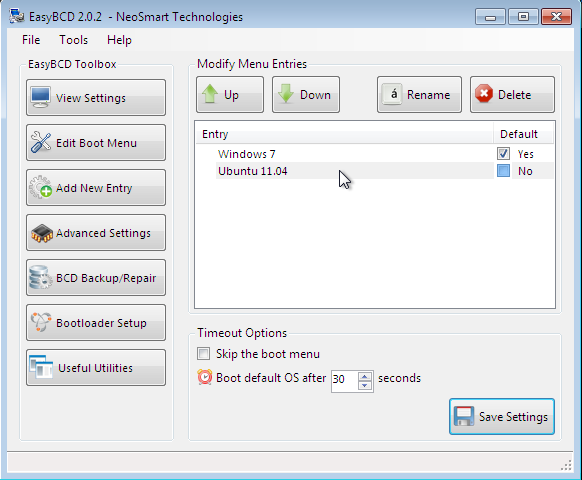
After installation and reboot, the computer will reboot into Windows. The final task then is to add an entry for Ubuntu in the boot menu of Windows 7. For that, the easiest program to use is EasyBCD, a free program by NeoSmart Technologies. Download and install it like you would any Windows 7 application. Start it and click on the Add New Entry tab, then on the Linux/BSD tab. From the “Type” dropdown menu, select “GRUB 2,” the version of GRUB used by Ubuntu 11.04. Click on the “Add Entry” button. Click on Edit Boot Menu tab to view the new configuration.
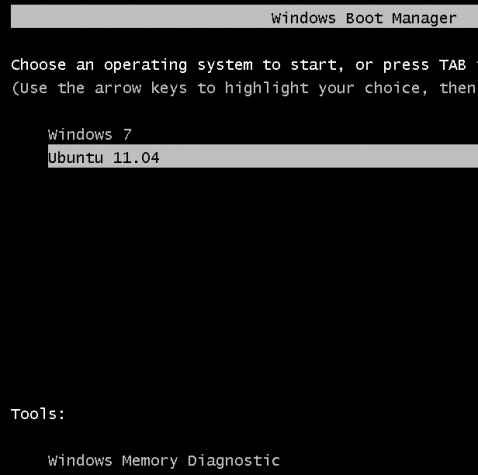
This is the boot menu you will see.
And this, when you attempt to boot into Ubuntu. Note: If at any time you decide to have GRUB be responsible for dual-booting, you can do so easily. Just log into Ubuntu and write GRUB to the Master Boot Record, or MBR. And if you want to switch back to Windows’ boot manager, log into Windows 7, start EasyBCD and use it to overwrite GRUB.


